Page Layout
-
Master pages include common graphics and text for every page of your document
- Use the master options to change master page properties, like master title
- Can have multiple master pages
- Open the Pages panel and double-click on Master page
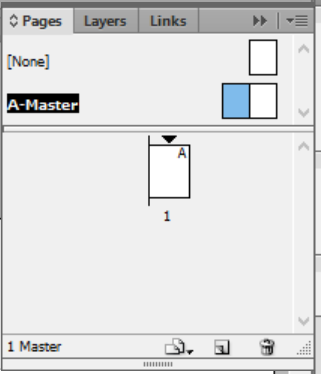
- The page you have selected appears in the bottom left corner of the window
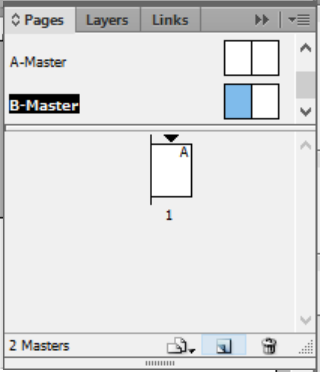
- To create a new master page, open the Pages panel
- Click on Menu > New Master
- At this point, you can choose to make a master page from scratch or to base it on another master page
- Click on Menu > New Master
- To apply a Master to a page, click and drag the master onto the page to which it should be applied
- Setting up a Master with a primary text frame is good for long, simply designed documents like books
- When content is added, InDesign will automatically create new pages based off this primary page
-
All of the settings for your final document should be in place prior to building the document
- The one flexible setting is the number of pages
- Prepare a few styles in advance of importing text
- Adjusting the layout of your document: Objects will not automatically reflow after you change the layout, so it is important to initially set up your document how you’d like the final document to look
- Changing document or page settings will not reflow your document
-
You can save new document settings as a preset
- There is a save button next to the document preset [custom]
-
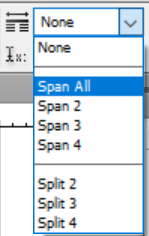
Use Paragraph Layout to set text or objects to span columns
-
As you create objects, they stack from bottom to top
- This is similar to how objects stack in PowerPoint
- A screen reader will also interpret the reading order from bottom to top
- To change object order, click on Object and select Arrange
- Expanding layers will allow you to see all objects in a page
-
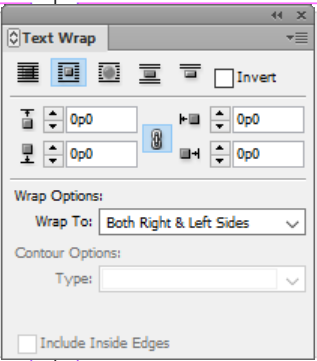
To wrap text around an object, click Window and select Text Wrap
- Select the object around which the text will wrap and click Wrap Around Bounding Box
- You can also change the offset (space around the object)
- For irregular shapes: Select object
- In Window, choose Text wrap > Wrap around shape
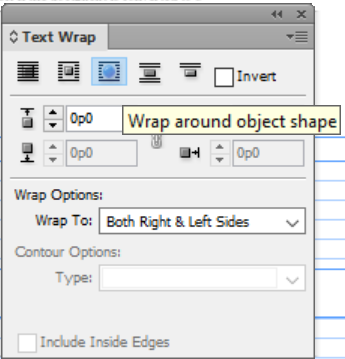
- You can manually change the wrap options
- Select the object around which the text will wrap and click Wrap Around Bounding Box
-
To break the document into different sections:
- Open the Pages panel and right click on the page that starts the new section
- Click on Numbering and Section Options > Start from page… or Continue from previous…
- To view a page, open the Pages panel and click the down arrow over the page thumbnail
- Example of different sections: numbering an introduction as i-xii
- Open the Pages panel and right click on the page that starts the new section
-
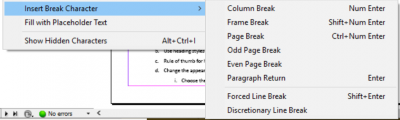
To insert a break character: Select the Type tool > Insert Break Character
- This is similar to a page or column break in Microsoft Word
-
To create a soft return (similar to a line break in Microsoft Word): Use Forced Line Break


Text
-
Thread text: If text is overflowing a frame, click the red + symbol
- This loads text into the cursor, so you can put the overflow text into another frame
- Text threads are blue lines that show connected frames
- A small blue arrow in the In Port frame shows the continuation of threaded frames
- Empty or hollow In Port boxes show the start of the story
- Select View > Extras > Show/Hide Story Threads
- Threading helps reading order to be correct when exporting to PDF
- Click and drag to create a text box for the threaded text
- This is useful for stories, where you may want to continue on a later page
-
Jump lines like “continued on page…” and “continued from page…”
- To add these lines, create a new text frame and move it completely within the story frame
- Type in the text of choice
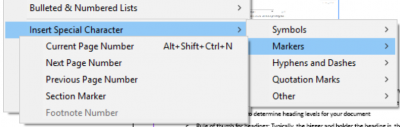
- Select Type > Insert Special Characters > Markers > Next Page Number (or Previous Page Number)
- Then turn on text wrap in the story frame
- To see where to set the “continued from page…” line, follow the text threads
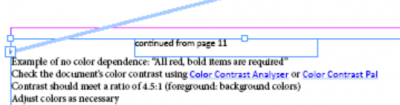
- To add these lines, create a new text frame and move it completely within the story frame
-
Use the Articles panel: Window > Articles
- This takes all the pieces of a story and puts one section tag (<Sect>) around them
- It also defines the reading order
- Meant for one threaded story or one complex page: Does not work well when rolls over into the second page
- Click on one piece of the article (Example: the article’s title) and drag into the Articles window
- This will show a dialog box to create new article
- Check off “include when exporting to PDF”
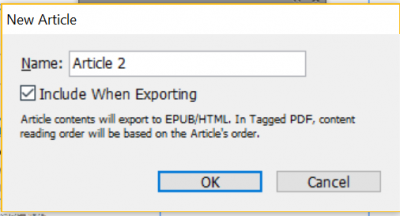
- Drag all pieces of the article into the Article window

-
To add page numbers: Draw a text box
- Then select Type and click on Insert Special Character
- Select Marker
-
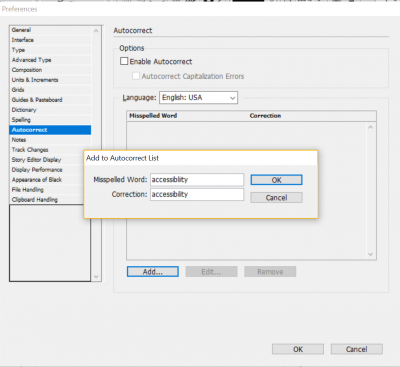
Use autocorrect for misspellings: Select Edit and click on Preferences > General > Autocorrect
- Add in your common misspellings
- Many common errors are preloaded
- Can set it up to replace abbreviations or acronyms with full text
Styles
-
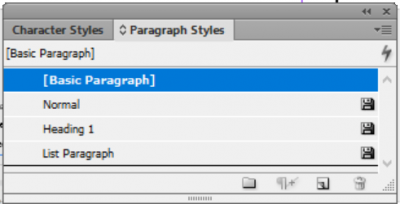
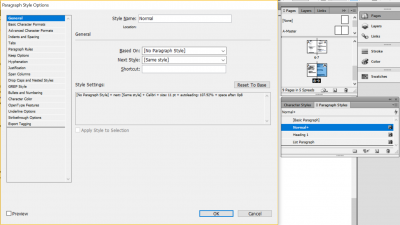
Use styles to keep formatting consistent
- Click on Window and select Styles > Paragraph Styles (or any other style you would like to set)
- Alt + New Style opens a dialog box for the new paragraph style
- Changing a style updates any text where the style is used
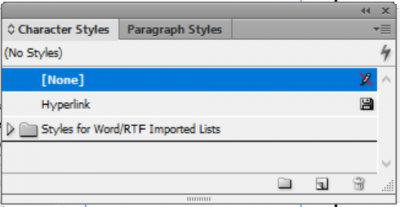
- Use character styles to change the look and feel of a character
- Example: Making text bold or italicized, changing color
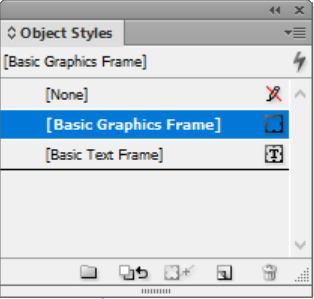
- Object styles are very similar to paragraph and character styles
- Select Window > Styles > Object
- Be sure to check off Apply Style to Selection
- Click on Window and select Styles > Paragraph Styles (or any other style you would like to set)
-
Click on each element to see what style is assigned to the text in Paragraph styles
-
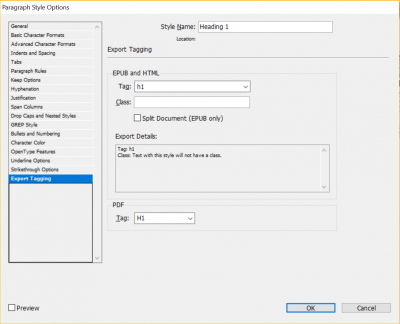
To ensure that a style exports with the correct tag, right click on the style
- Select Edit (style name) > Export tagging
- Set the appropriate tag in the drop down
- The only automatic tagging you should use is for lists
-
To bring text into the document: Click on File > Place
- Preserve styles and select Show import options
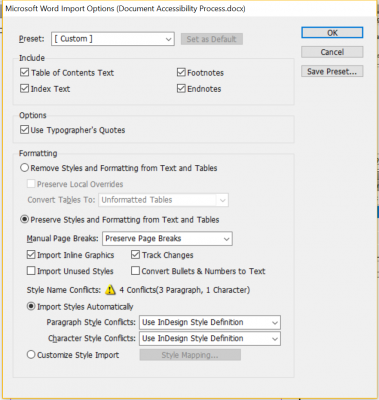
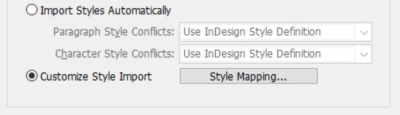
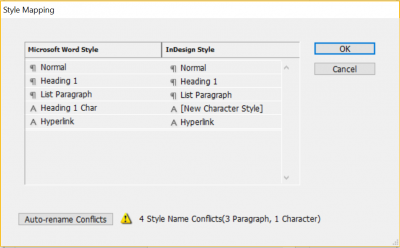
- Select Customize style import > Style mapping: This allows you to assign Microsoft Word styles to specific InDesign styles
- Can also be used with your custom InDesign template
- If choose [new paragraph style], not much of the styling is in your control: InDesign will just import all Word styles as best as it can
- Note: You do not have much control over properties in brackets []
- The bottom options allows you to define your style
- Only need to customize headings and other text formats when you know you’ve used it in the Word document
- All other styles can be mapped to [new paragraph style]
- Must always define list styles (bullets and numbering)
- Otherwise, tags will not be correct when exported to PDF
- The only time you can do style mapping is prior to placing text
- Otherwise, have to start over or manually fix
-
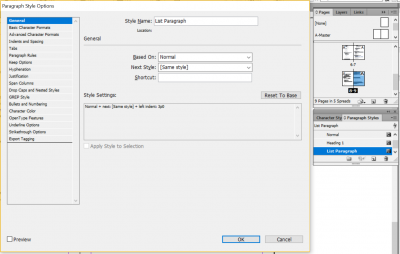
Right click on a style to change it and select Redefine Style
- This applies to paragraph and character styles
- Apply changes to text and select Redefine style using updated text
- Check Redefine Style when changing all fonts: This will change the style and all text that uses the updated font
- Find all text using a style with the Find and Change dialog box: Select Edit > Find/Change
- Can use this to find and replace formats
- This relies on defining styles ahead of time
- Find all text using a style with the Find and Change dialog box: Select Edit > Find/Change
-
Load styles from other documents by opening the Paragraph styles panel
- Click on the hamburger menu and select Load Paragraph Styles
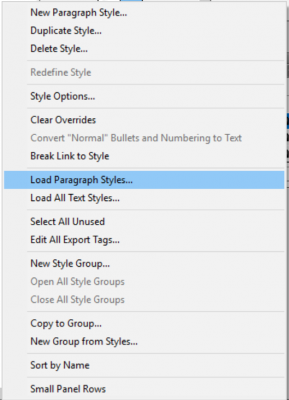
- InDesign will ask where the styles are located: Choose the document from which you want the styles and select the styles you want
-
Bullets and numbering: Open the paragraph control panel by double clicking on text and switching to the Paragraph panel
- Click on bullets/numbering
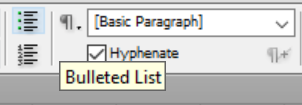
- Change the style using the Paragraph panel menu and selecting bullets and numbering
- Allows you to change the numbering style, how much space is between the bullet or number and the text, the bullet or number’s color, etc.
- Only use Unicode characters for bullets, not WingDings or similar characters
-
Nested Styles: Double click on a Paragraph style and select Drop caps and nested styles in the dialog box
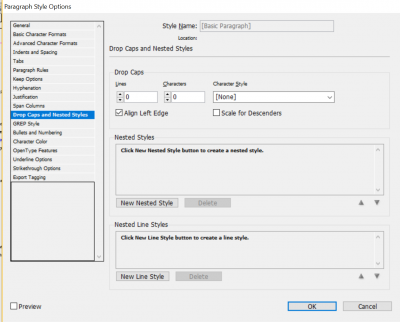
- Nested Styles are similar to CSS in that there are parent and child styles
-
Do not use skew to create false italics: This does not change the code to show emphasis
Tables
-
To draw tables, use the Type tool to draw a box
- Table tool can be used after drawing the frame
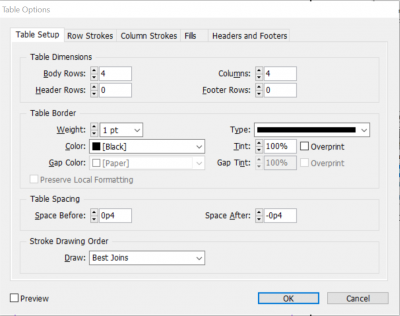
- Click Table > Insert Table to set up your table
- Use Table > Table Options > Table Setup to set header and footer rows
- Use tab to add rows
-
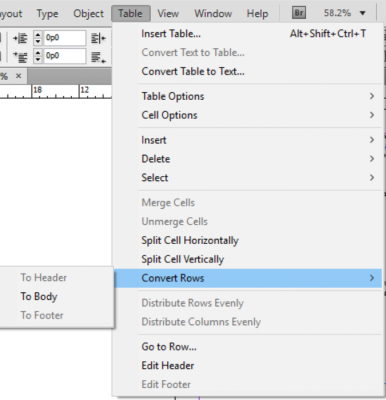
To set table headers and footers from existing rows:
- Select a row
- Click Table and choose Convert Rows
-
You can embed styles into table styles

- Select Window > Styles > Table styles to edit table style
-
Convert table to text: Select Table > Convert table to text
- Set options like column and row separators
- Text is separated by tabs, which shows InDesign how to create columns
- New paragraphs show where rows should be
Interactive
-
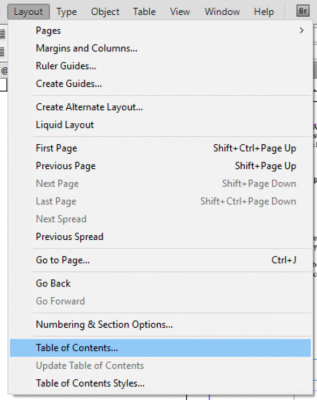
Table of Contents: InDesign knows the Table of Contents based on headings defined in Paragraph styles
- Select Layout and click Table of Contents
- Include paragraph styles
- Example: Heading 1
- Table of Contents styles are automatically created when you generate your Table of Contents
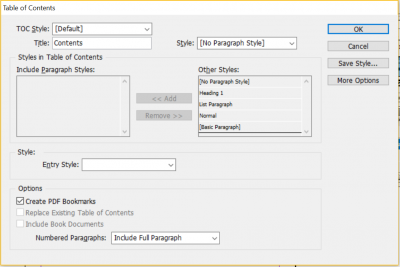
- You can automatically create bookmarks in your PDF from the Table of Contents
- You can also automatically create text anchors in the source paragraph, which allows you to click and jump directly to that point
- Include all book documents in your Table of Contents
- Manually set page number styles for any paragraph styles included in the Table of Contents
-
To create bookmarks: Select Window > Interactive > Bookmarks
- Select the text you would like to be your bookmark and click Create new bookmark

- When exporting to PDF, click Include bookmarks
- Add bookmarks to any document where you want users to know information, especially if that information is not on the first page
-
To add hyperlinks, select Window > Interactive > Hyperlinks
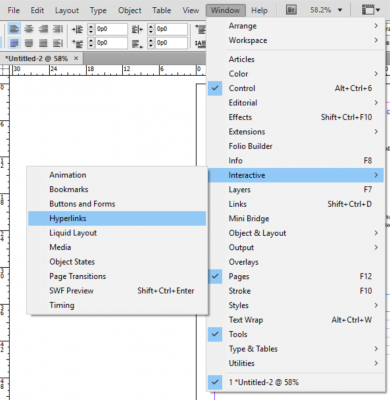
- Select the text you would like to be your hyperlink and type in the URL
- Can also set links to send to file, email, etc.: Create a new hyperlink from the hamburger menu
- InDesign automatically creates a character style called Hyperlink, which you can edit
Miscellaneous
-
To create an accessible PDF: Select Paragraph styles and select Style options
- Select Export Tagging
- Select the appropriate PDF tag
- Do a 1:1 match: Leave lists, footnotes, and endnotes as is, but check the mapping of other styles
- Always save before sending to PDF
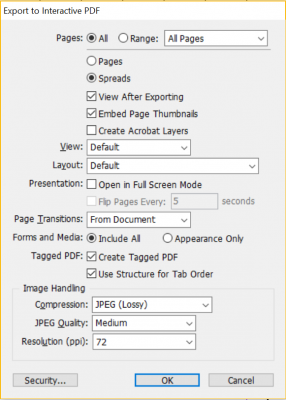
- Choose File > Export >Save as type > PDF Interactive
- In the export dialog box, export as pages (not spreads)
- Check the boxes for Create tagged PDF and Use structure for tab order
-
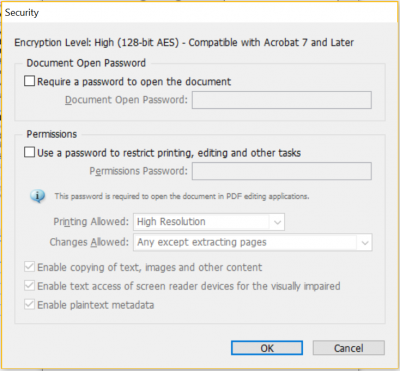
Under Security, enable text access of screen reader by checking the box
-
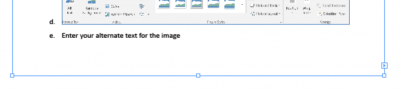
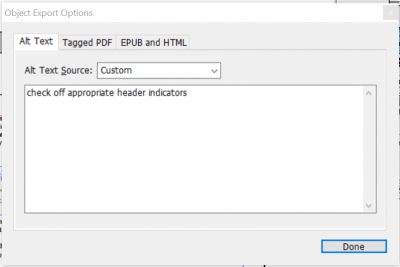
To add alternate text to images:
- Select Graphic and then click Object
- Under Object, select Object export options
- In Object export options, select Alternate text source > Custom
- Input your text
-
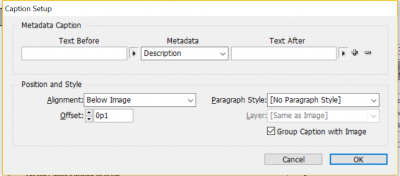
Add metadata captions:
- Select Object > Captions > Caption setup
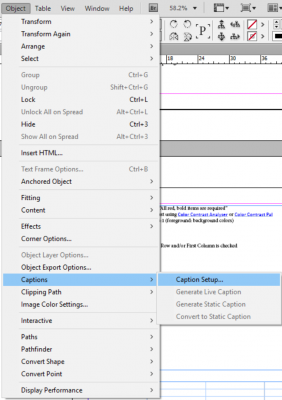
- Change metadata type to Description
- Group captions with image
- Fill out the description field for each image and enter descriptive text
- This will be used as captions
-
Add swatches and styles to your Creative Cloud library: Window > CC Library
- Click on the swatch or characters with styles and add to library
- Can add graphics to library as well
- Easy to use between documents
- Can share the library with other documents and users
-
To save InDesign templates, click File
- Select Save As and save the file as a .indt file

- When opening the template, can open as a new blank document (normal), the original template, or a copy of the template
- The default open is as a new blank document
-
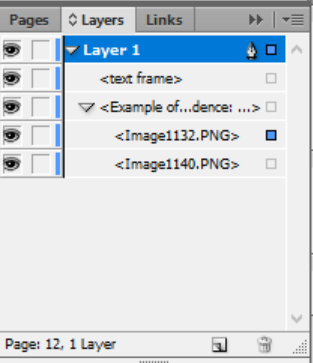
Stick to a single layer using the Layers panel: Window > Layers
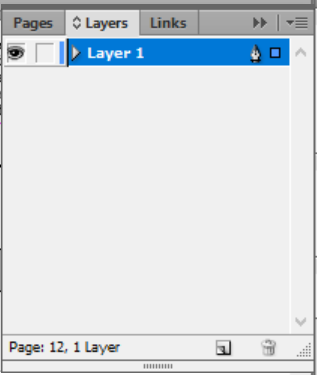
- Adding additional layers changes the reading order dramatically
- Click and drag objects in the Layers window to reorder: This affects the PDF’s reading order
- Check off Use for reading order in tagged PDF
- If you must use multiple layers, flatten before exporting to PDF
- You will have to manually check the reading order, because it will be changed in the PDF