Creating Accessible Source Documents
-
PDF accessibility depends greatly on the accessibility of the source document
- Both Microsoft Word and PowerPoint have accessibility checkers
-
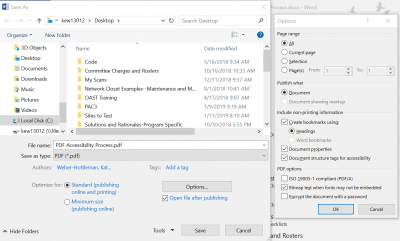
When saving as a PDF from Microsoft Word:
- Click "Save As" and change the document type to PDF
- In the dialog box, click Options
- In Options, ensure that "Create bookmarks using: Headings" is checked
- This option will not be available if there are no headings in the Word document
-
When exporting to PDF from InDesign, click to include bookmarks
- Similarly to Microsoft Word, InDesign has heading styles that can be made into bookmarks in a PDF
-
If you use a unique font, you can embed the font into the document
- Click on the Optimize PDF tool
- In the toolbar, click on Advanced Optimization
- In the dialog box, click on Fonts
- Choose fonts to retain or unembed

-
To maximize editing ease, scan your document at as high a resolution as possible
-
Enhancing scans a few times will result in a better scanned document, which is likely to be more accessible
- Note: This is not necessary for documents that are saved from Microsoft Word, PowerPoint, etc.
- Click on the Enhance Scans tool
- Click Enhance in the toolbar
- Choose Scanned Document from the drop down
-
Use Export to PDF or Save As PDF, not Print to PDF
- Print to PDF removes much of the document's accessibility information, including information about headings and alternate text for images
Manually Making a PDF Accessible
If not using Action Wizard, use the following steps to make your PDF accessible.
-
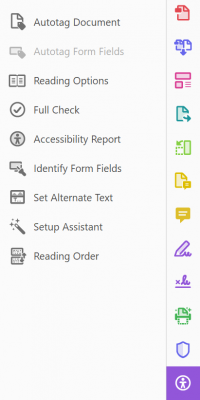
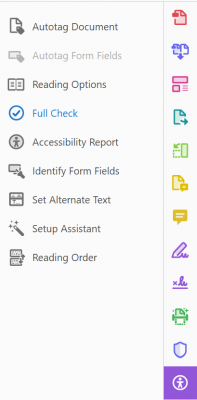
Under Accessibility, choose Autotag Document
- If the document is already tagged, choose to either overwrite tags or skip this step
-
Set hyperlinks in your text
- Select Edit PDF
- Choose Link > Add/Edit Web or Document Link
- Draw a box around text or image for link
- Enter URL
-

-
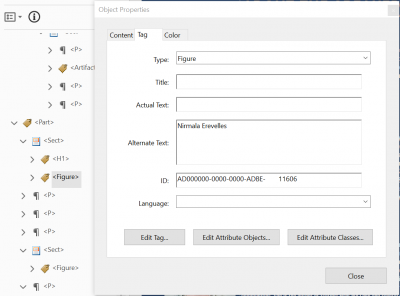
Set ALTs (alternate text) for all images
- Open the Tag Tree: View > Show/Hide > Navigation Panes > Tags
- Right-click on Figure tags to open Properties
- Edit Alternate Text
-
Set decorative or background images as Artifacts
- Open the Tag Tree: View > Show/Hide > Navigation Panes > Tags
- For Figures that should be decorative or background images, change the tag to read <Artifact>
-
Include transcripts or textual descriptions for all purely audio or purely visual media
-
Use only captioned multimedia
-
Check the document for color dependence
- Ask if the document uses color only to convey meaning
- Example of color dependence: "All red items are required"
- Example of no color dependence: "All red, bold items are required"
-
Check the document's color contrast using Color Contrast Analyser or Color Contrast Pal
- Contrast should meet a ratio of 4.5:1 (foreground: background colors)
- Adjust colors as necessary in original document
-
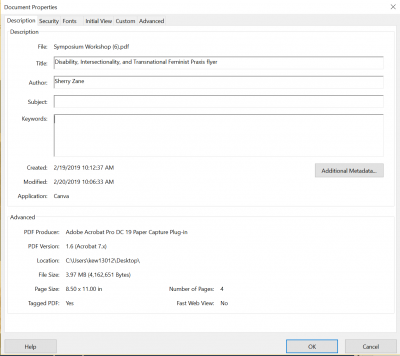
Ensure that the document has a title
- Under File, choose Properties
- Enter a Title for the document
- A title might be the first heading or name of the document
-
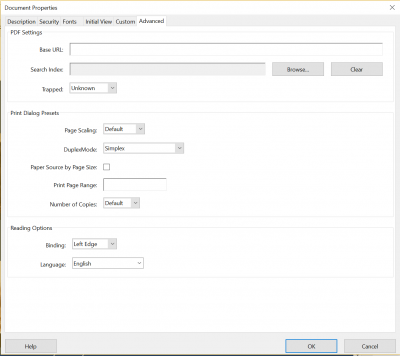
Set the document's language
- Under File, choose Properties
- Choose Advanced properties
- Under Reading Options, set the document's language
-
Check Tag order
- This is what a screen reader uses to determine how a document is read out
- Check that the tag order matches the logical reading order
- Rule of thumb for reading order: It should follow the order in which information appears visually
- If the tag order does not match the logical reading order, click and drag on tags to reorder
- For complex documents, you may have to add additional tags or delete tags
- Add a tag by clicking on the tag above where you want the new tag to appear
- Highlight information to be tagged
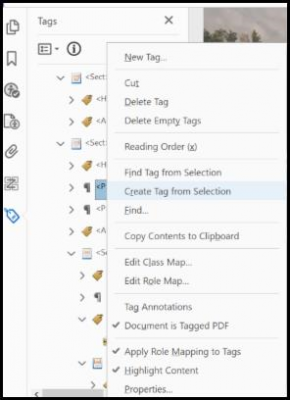
- Right click on the tag above where you want the new tag to appear
- Select Create Tag from Selection
- For images, you may need to create a new tag via the Reading Order panel
- Open the Reading Order panel: View > Show/Hide > Navigation Panes > Order
- Right click on any item and open Show reading order panel
- Use the tool to draw a box around the area to be tagged and select the type of element
- Right click on the new item and select Tag as… with the appropriate tag
-
Ensure that headings are correctly set in the initial document and are tagged appropriately
- Open the Tag Tree: View > Show/Hide > Navigation Panes > Tags
- In Tags, move through heading tags (i.e. H1, H2, etc.) and paragraph tags
- Are any tags that should be paragraphs labeled as headings?
- Are any tags that should be headings labeled as paragraphs?
- Are any headings the wrong heading level? (i.e. a heading level 1 is labeled as an H2)
- Rule of thumb for headings: Typically, the bigger and bolder the heading is, the higher the heading level
-
Create and edit any tables
- Using the Tag Tree
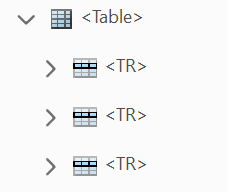
- Open the Tag Tree and find the <Table> tag
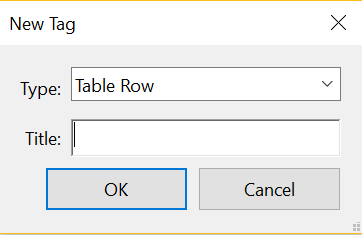
- Nest Table Row <TR> tags under the <Table> tag. If <TR> tags are already nested under the <Table> tag, skip this step.
- First, create a new tag by right clicking on an existing tag.
- First, create a new tag by right clicking on an existing tag.
- Your <Table> should now look like this:
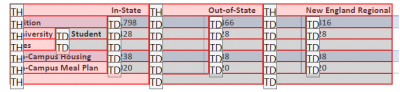
- Nest Table Header Cells <TH> or Table Data Cells <TD> under the <TR> tags. If <TH> and/or <TD> tags are already nested under the <TR> tags, skip this step.
- Your <Table> should now look like this:
- Your <Table> should now look like this:
- Highlight text, right click on the <TH> or <TD> tag, and choose Create New Tag from Selection.
- Continue until the <Table> is complete
- Proceed to Section 3: Setting Cell Type and Scope
- Open the Tag Tree and find the <Table> tag
- Using the Order Tool
- Open the Order tool
- Right click on any element in the Order tool to open the Reading Order Panel
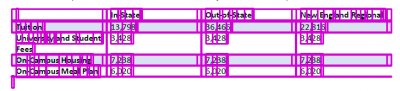
- Draw a box around the table. This will cause all cells to be highlighted.
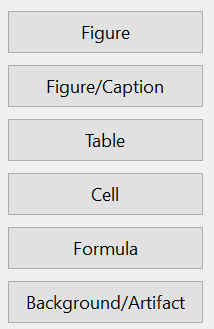
- Choose “Table” from the Reading Order Panel
- Setting Cell Type and Scope
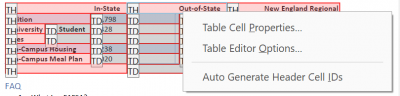
- With the Reading Order Panel open, click on the newly created table
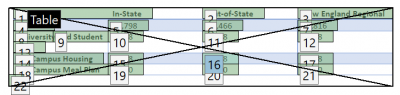
- “Table Editor” will appear as an option in the Reading Order Panel. Select it to edit the table
- The table will now appear as cell types
- Right click on a cell to open Table Cell Properties
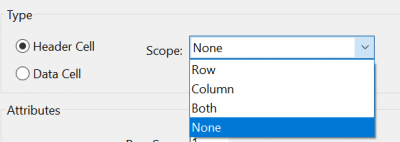
- Set the cell type (header or data cell) and, if the cell is a header cell, set the scope
- Hint: The cell’s scope will be what the header is describing. If it is describing a column, then the scope will be column.
- Hint: The cell’s scope will be what the header is describing. If it is describing a column, then the scope will be column.
- If the header cell is spanning multiple rows or columns, set the Row Span or Column Span under Attributes
- Click OK to close the Cell Property Editor
- With the Reading Order Panel open, click on the newly created table
- Using the Tag Tree
-
Run a full accessibility check via the Accessibility tool
- Fix any remaining problems
- In the full check, Reading Order and Color Contrast will ALWAYS come up as requiring manual review. This is because a machine cannot determine if reading order is accurate or if color contrast is compliant


PDF Forms
-
Select the Form tool
- Choose Prepare Form
- Choose the document from which to begin
- Use the Prepare Form toolbar to create form fields
- Double click on a form field to edit properties
-
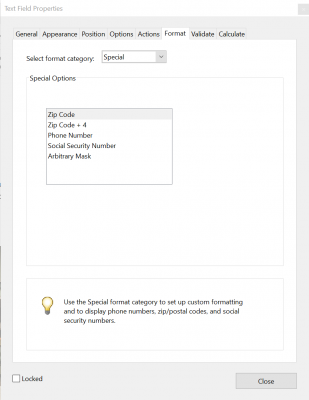
Use special formats for form fields: Adobe provides specific preset form fields for information like zip codes, phone numbers, and social security numbers
- Create a text field
- Double click on the text field to open Text Field Properties dialog box
- Click on Format
- Select the Special format category
-
Fill out a form field's name and Tooltip: Both are essential for accessibility
- If a form field is a checkbox or radio button, the name should include both a summary of the question and the option
- Example: A question may read "What is your ethnicity?". The response may include "Caucasian". The option "Caucasian" would have a name property of "Ethnicity: Caucasian" and a Tooltip of "Caucasian"
-
Autotag form fields by selecting the Accessibility tool
- Choose Autotag Form Fields to automatically add identified form fields to the tag tree
To learn more about creating accessible PDF forms, read this article from WebAIM or follow UConn's guide. Adobe also has a user guide for creating automatically-recognized form fields.